A Year of Painting

I almost didn't do this post.

To do it right potentially requires pulling out the camera and taking quality photos of newly painted figures. Honestly, I don't want to stop painting long enough to do that.

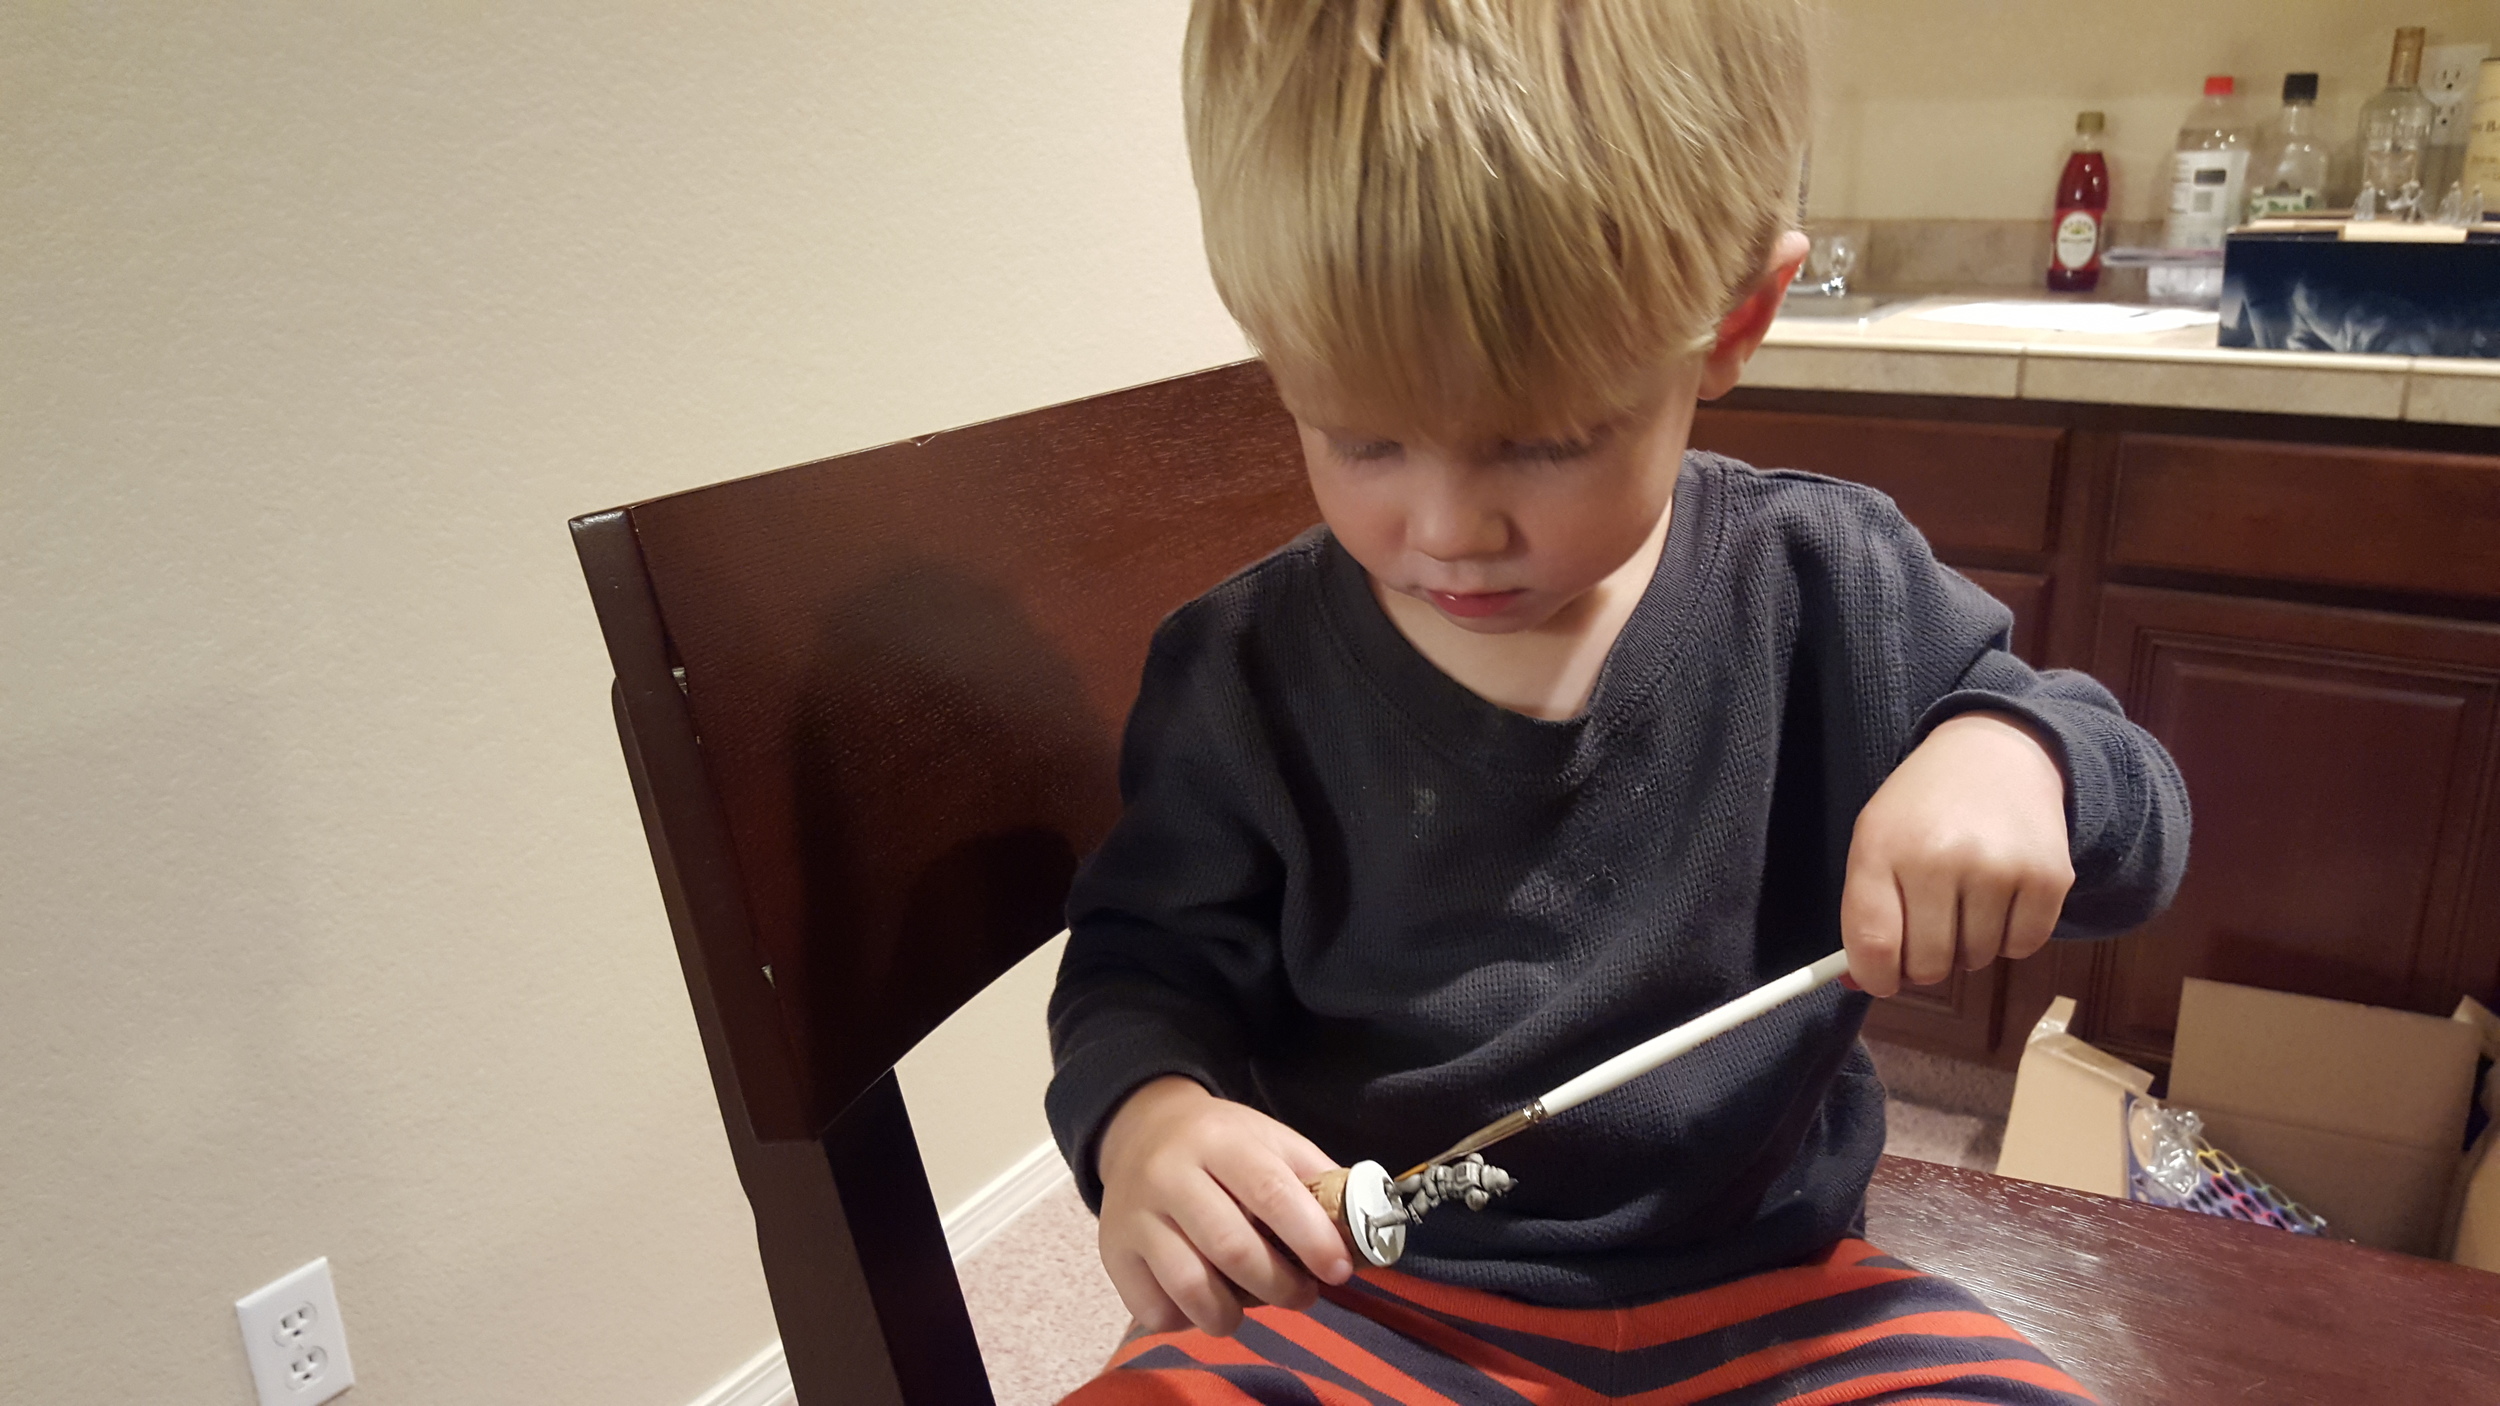
The story goes something like this. While we were in Scotland for my brother's wedding I found Sorastro's Painting Guides for Imperial Assault. I had been fooled into buying the Imperial Assault deal on Massdrop, and it had arrived shortly before we left. There was not much literature about IA, and searching for it instead produced a link to Sorastro's guides. 

It only took one watch to know that I wanted to try my hand at painting.

The first Stormtroopers were full of mistakes. You can read about those mistakes here.  

The first Imperial Assault Stormtroopers.  You can see the brown wash used instead of black on them.  Having the correct paint helps.

The droids that followed weren't much better, but they were easy to do. 

These minor improvements continued. Each miniature introduced a new technique to understand and master.

Then Vader was the next figure I wanted to do.  That said, I had zero confidence in my own ability to properly highlight a miniature.  An alternative was needed.  Queue Zombicide!

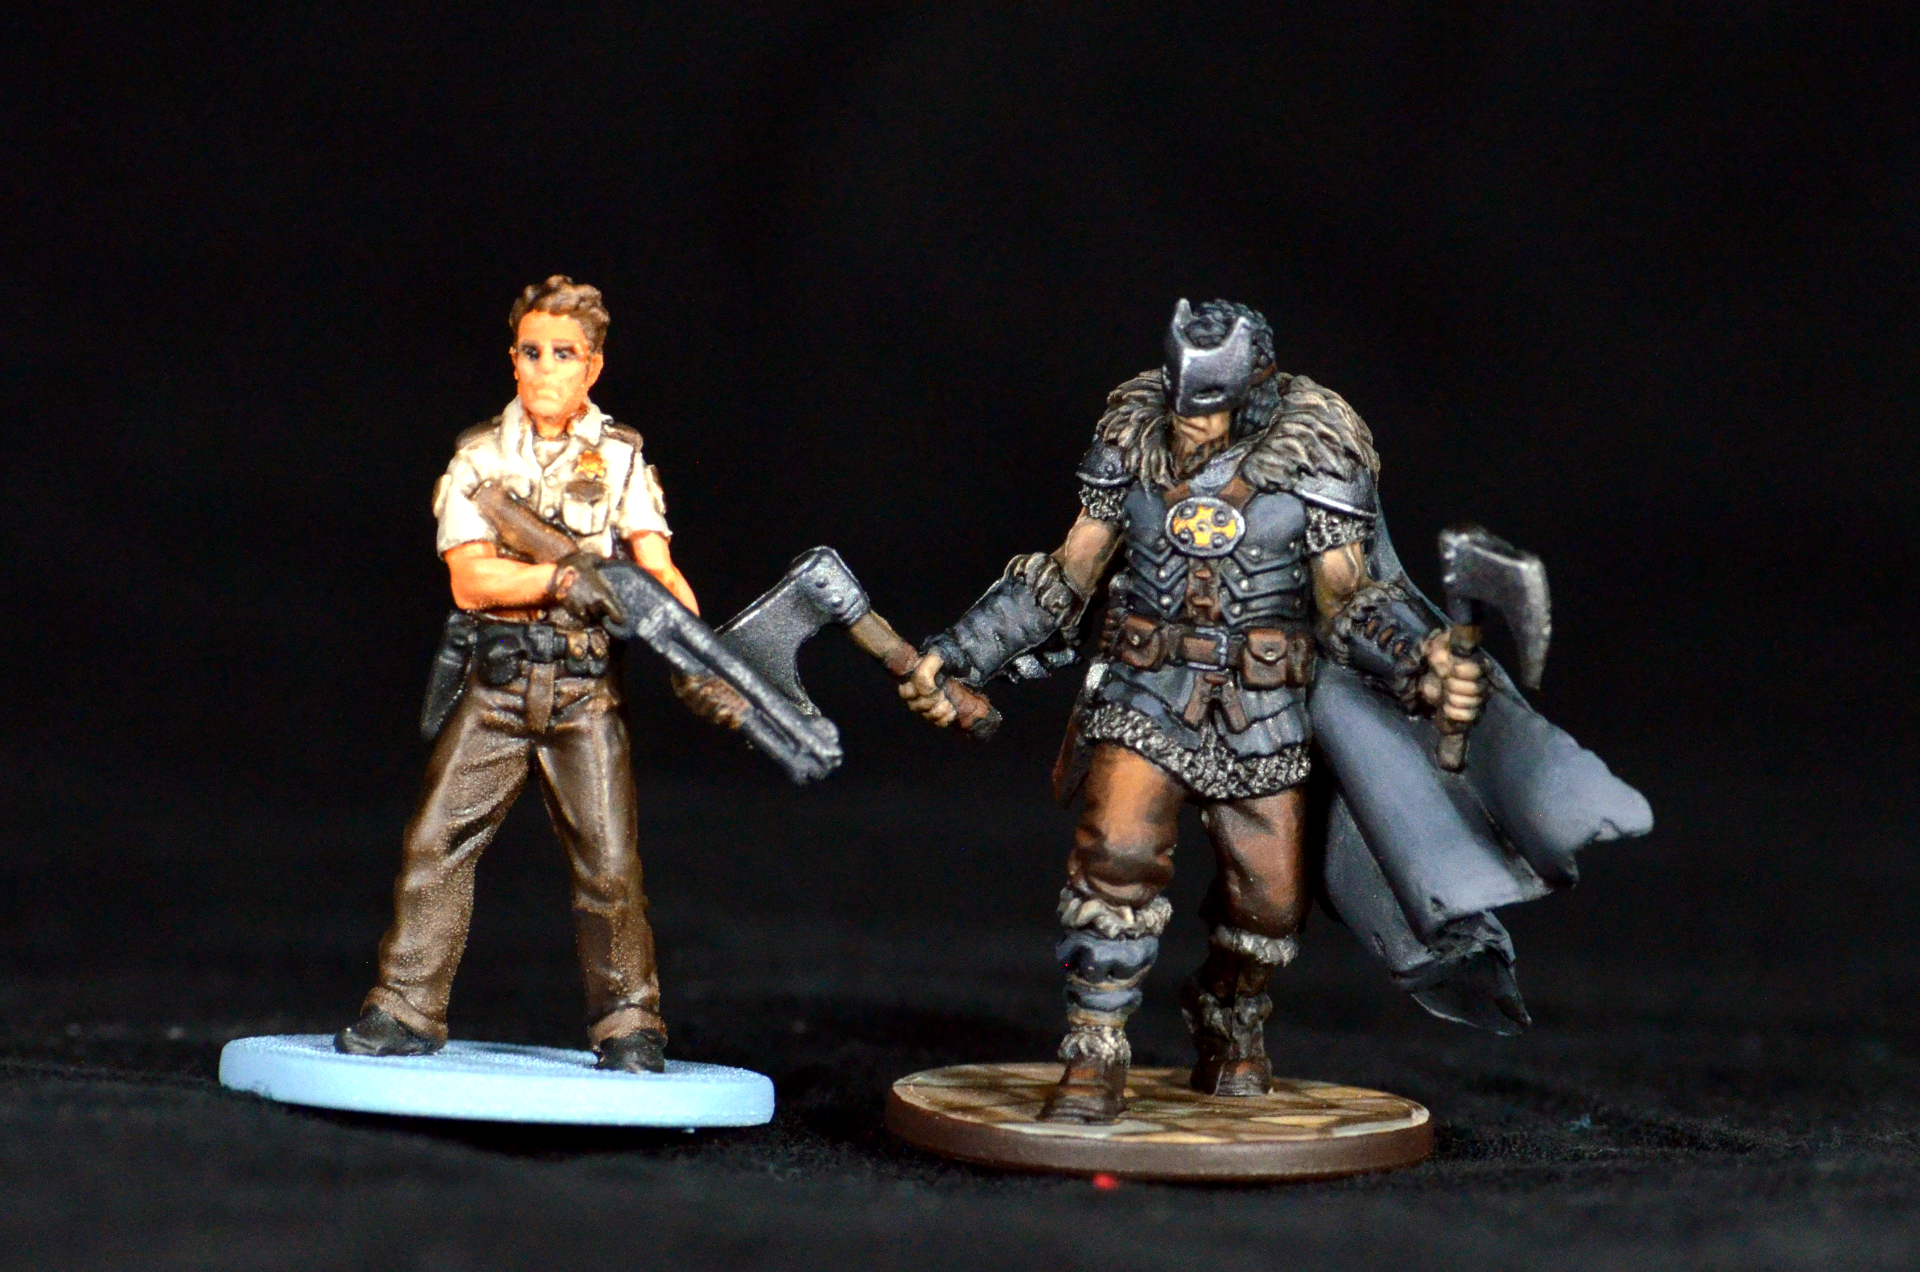
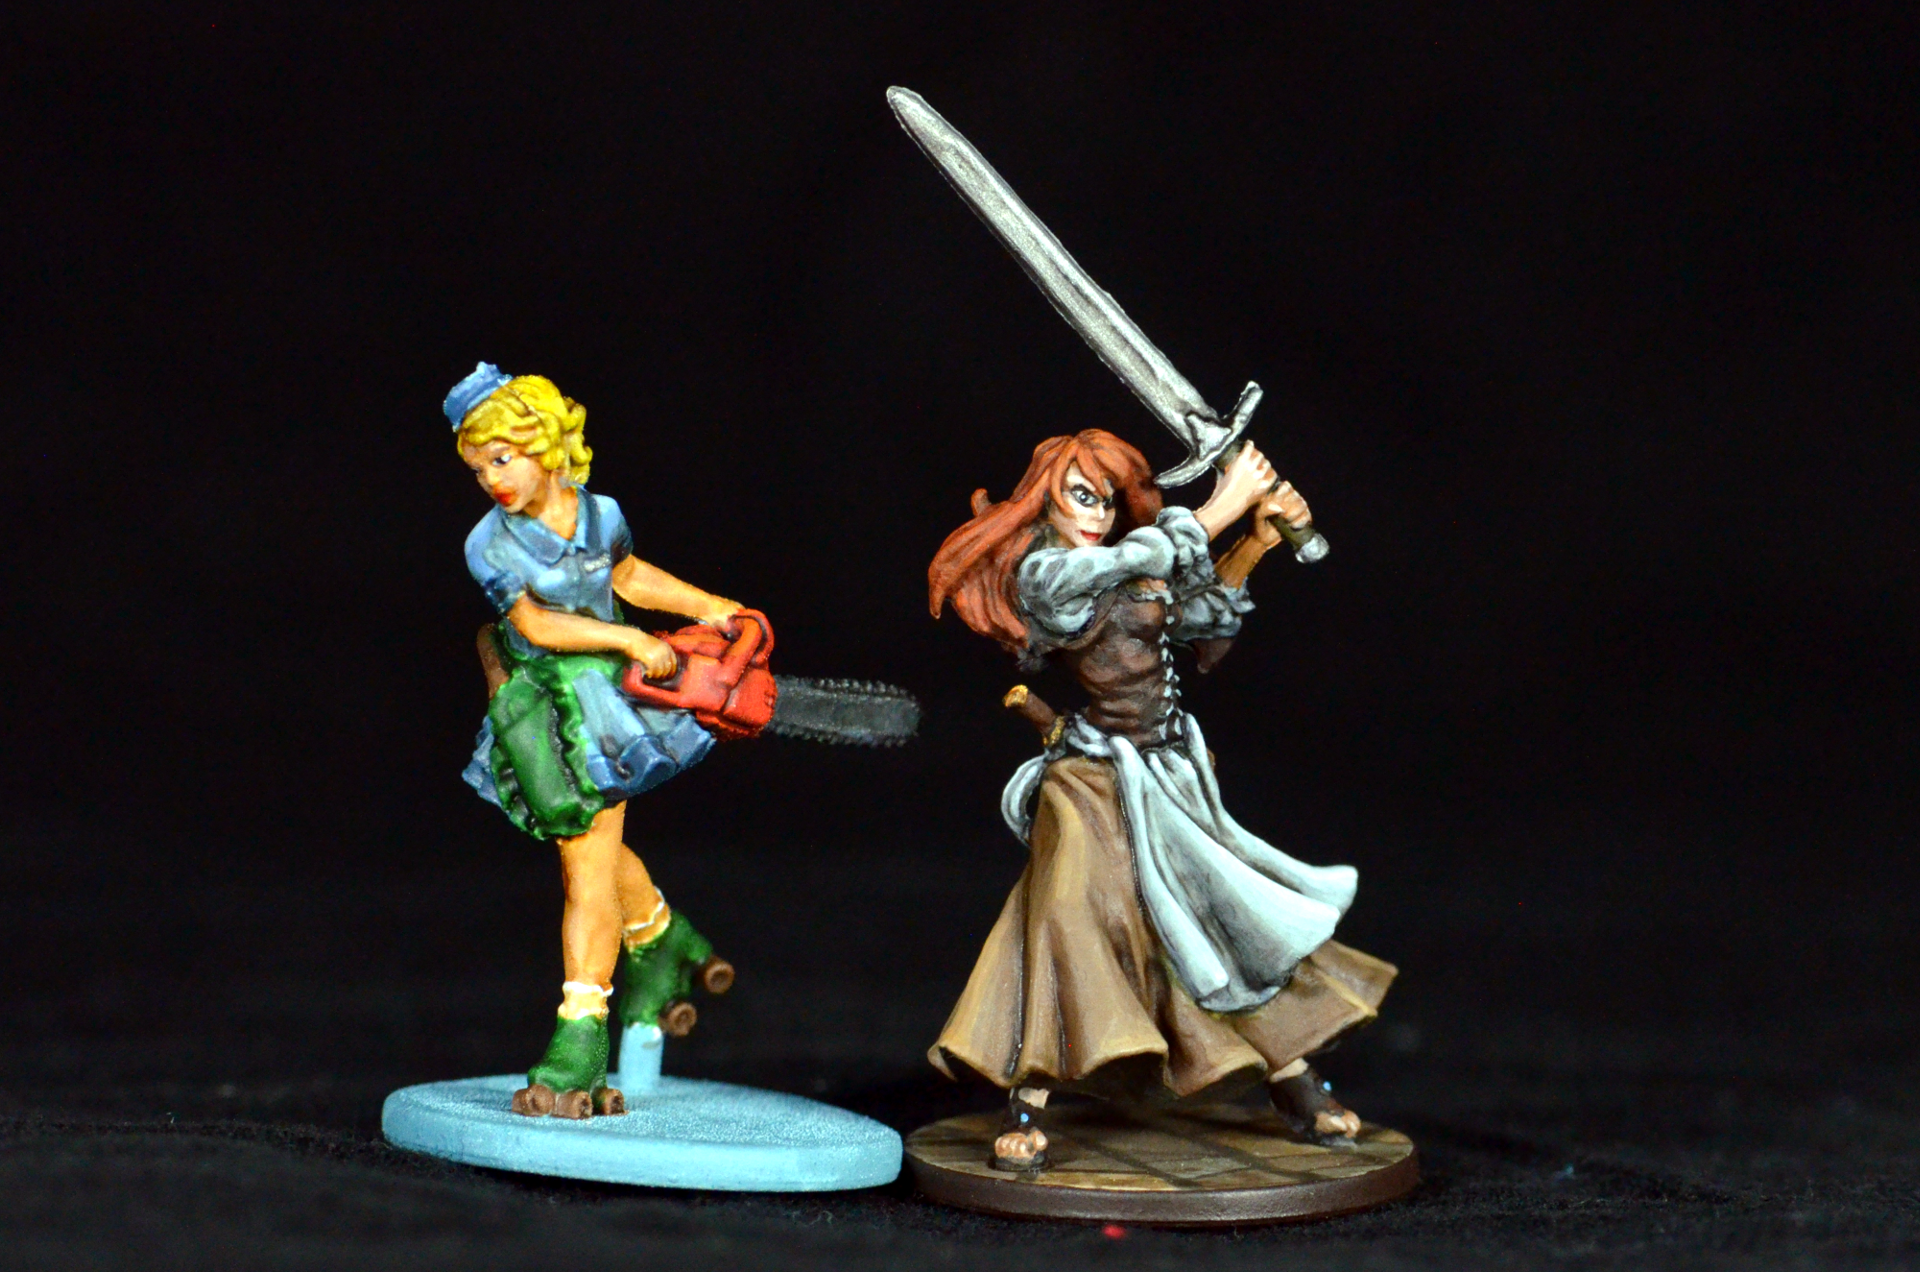
Zombicide comes with so many miniatures that it was the perfect tool to help get better. Painting half of the zombies and the survivors helped me understand contrast and color theory better. 

The Zombicide survivors are under attack...

Then, "real" miniature games started calling. Infinity was the next game painted, and that phase lasted for a good 8 months and will continue once I have wrapped up Zombicide Black Plague (and possibly RelicBlade as well). There are still hundreds of unpainted Infinity minis. That said, many of my favorite paint jobs have been on the Infinity miniatures.  

All of the Infinity miniatures completed in 2015.

Painting the Corvus Belli sculpts is quite different from painting the Imperial Assault or Zombicide minis. Infinity generally has detail to the extreme, including what could best be described as greebling. The poses aren't as dynamic as I would like, but they generally gave character and style. 

After dabbling in three different factions, the Steel Phalanx of the ALEPH was the force chosen to be focus on.

The first Infinity list, 150 points of Steel Phalanx.

The first Infinity list, 150 points of Steel Phalanx.

This was my first alternative color scheme, and it didn't really hit its stride until about 15 miniatures in. There are a few good miniatures in there and they have a similar theme, but the identity and cohesion I was hoping for never matured in a way that looked great on the table.

Infinity has officially occupied most of my painting time.  I started painting Caledonians in October and continued until June when I took a break for Zombicide: Black Plague. Over 8 months of painting miniatures for the same game.

And now for a sad statistic.  In that 8 months, I only completed 56 figures for my collection. That is nearly 255 days at a rate of a miniature every 4.5 days.

Ouch.

Zombicide: Black Plague has been fun even if the miniatures are a lower quality.  I learned how to airbrush while painting it, and it was like being back at the beginning all over again.

The airbrushed Abominatroll next to Scowl and Grin from the Zombicide Black Plague kickstarter.

The airbrushed Abominatroll next to Scowl and Grin from the Zombicide Black Plague kickstarter.

Man, I am bad at airbrushing right now.  But with practice, and I have a ton of miniatures to practice on, I think it can be an amazing tool in the arsenal.

So there it is.  My year of painting in review.  Honestly, it was all possible because of the magical Sorasto. Please check out his guides and consider sponsoring him on Patreon if you fall in love with the hobby as I have.

Finally, here is a small gallery of how my panting has improved over the year.  Thanks for reading and- to quote Sorastro- happy painting!
Recent Adventures in Painting Miniatures

The last two weeks of painting has been a bit like high school: fun, repetitive, and awkward. 

Some of the last figures of the Empire were the first goal, and that required a paint purchasing frenzy. My goal was to finish the Imperial Guards and the Imperial Officers to try my hand at blending. 

The results weren't disastrous, but they were disappointing enough to wait on the Rebel heroes. 

The Guards are easy to paint; they are red. The problem is making them interesting. Sorastro attempts to liven them up by applying highlights, so that's what I would do! 

I decided to use Citadel's red wash, which is labeled for flesh, as the wash for the Guards. This wound up uneven after the first coat, so a second application of the wash was applied. The result was over-dark reds and largely uneven shadows, which would make the highlights contrast more than intended. 

Over-washing the figures was my only major mistake on the Guards, and I am pleased with how they turned out; red and a bit boring, precisely like the Emperor's Guards in the movies. 

The officers were another story. 

My goal with the Imperial forces was to capture their clean appearance. One of the themes I find in the great Ralph McQuarrie's work is that evil is clean, shiny, and a bit bland.  It is as if the evildoer's... evil removes them from the color and dirt of the universe they inhabit. Good on the other hand is often dirty and rough.  It takes effort, sacrifice, and perhaps duck tape to be good in Star Wars, and I love that idea.

Using the idea that evil is clean, I decided to paint my regular officers in black uniforms, and the elite in a star captain's gray.

Making the figures interesting was going to be difficult. The essence of the sculpt is not the blaster, uniform, or even the face; it is the index finger. The officer points in a manner that is one part command, and another part condemnation. 

My biggest mistake was not realizing the finger was the focus until after the figures were painted.

Instead, I focused on the uniform or the face, leading to some hilariously odd Officers. 

My original thought was to make the uniform the focus, even on the two officers in black.  I applied highlight after highlight, but made a few mistakes while doing so.

The first mistake was that my highlight layers were not thinned enough.  This resulted in lines that were far too strong instead of gradual.  It made the officers look as if they had zebra stripes.

The next big mistake was making overly bright highlights in places that should have been darker. The officers looked as if their skirts were glowing.  Hardly the representation of Imperial might that I was going for.

Thankfully, with an additional layer of wash, I was able to tone the highlights down.

The next task was even more daunting: the face.

More unsuccessful eyes...

Instead of following Sorastro's suggestion of using a red wash on the Officer's faces, I decided to go with the softer Serapham Sepia wash in hopes that the Officers would look more pale. However, even this less-colorful wash made the Officers look healthy.  Oh well.

Next, I decided to be brave and try to paint eyes.  As you can see, it didn't go so well.  For brevity, these are some of the things I learned about painting eyes:

  1. Never try something on a special unit when there are grunts available to practice on.
  2. It's easier to get the bottom part of the white covered, but that's not what you want.  Try to cover the top of the white first.
  3. Use a small brush and clean it between each attempt.
  4. Be quick, the paint on the tip will often dry before applied.  If it does, be patient and wash it out instead of trying to brush it on.

The truth, which you can even see in the photo below, is that the Officer's finger should have been the focus of my highlights the entire time.  Sure, the uniform did need a highlight or two, and the faces needed some texture.  However, if I had spent more time making the accusing point of the Officer stand it, it would have been a more interesting figure on the table. Instead, I barely spent any time on the Officer's hand, only applying a single highlight and a wash to the most interesting part of the figure.

Fenn facing down the newly painted officers.

Somehow, I only have the Royal Guard Champion, 2 AT-STs, and Darth Vader left to paint for the forces of the Emperor.  Overall, I'm quite pleased with my Imperials.  The Officers could be better, and if I paint more Stormtroopers, I am going to go with a much lighter wash on the armor.

That said, I do not have much confidence in my ability to do Vader justice and cannot find a good gray primer unfortunately.  Before continuing with Vader and the Rebels, I decided to take a break to paint a bunch of Zombicide figures.  Getting to play with colors and devise outfits for the zombies and heroes has been a bunch of fun, so I'll be writing about that in the near future.

Something Like Painting: A Better Shot

The One TAR posted a fantastic guest-hosted video on her channel about taking better pictures of board games. You should watch it!

I've been trying to pretend that I know how to take photos for a long time, but Scott makes numerous fantastic points about what makes a good photo. 

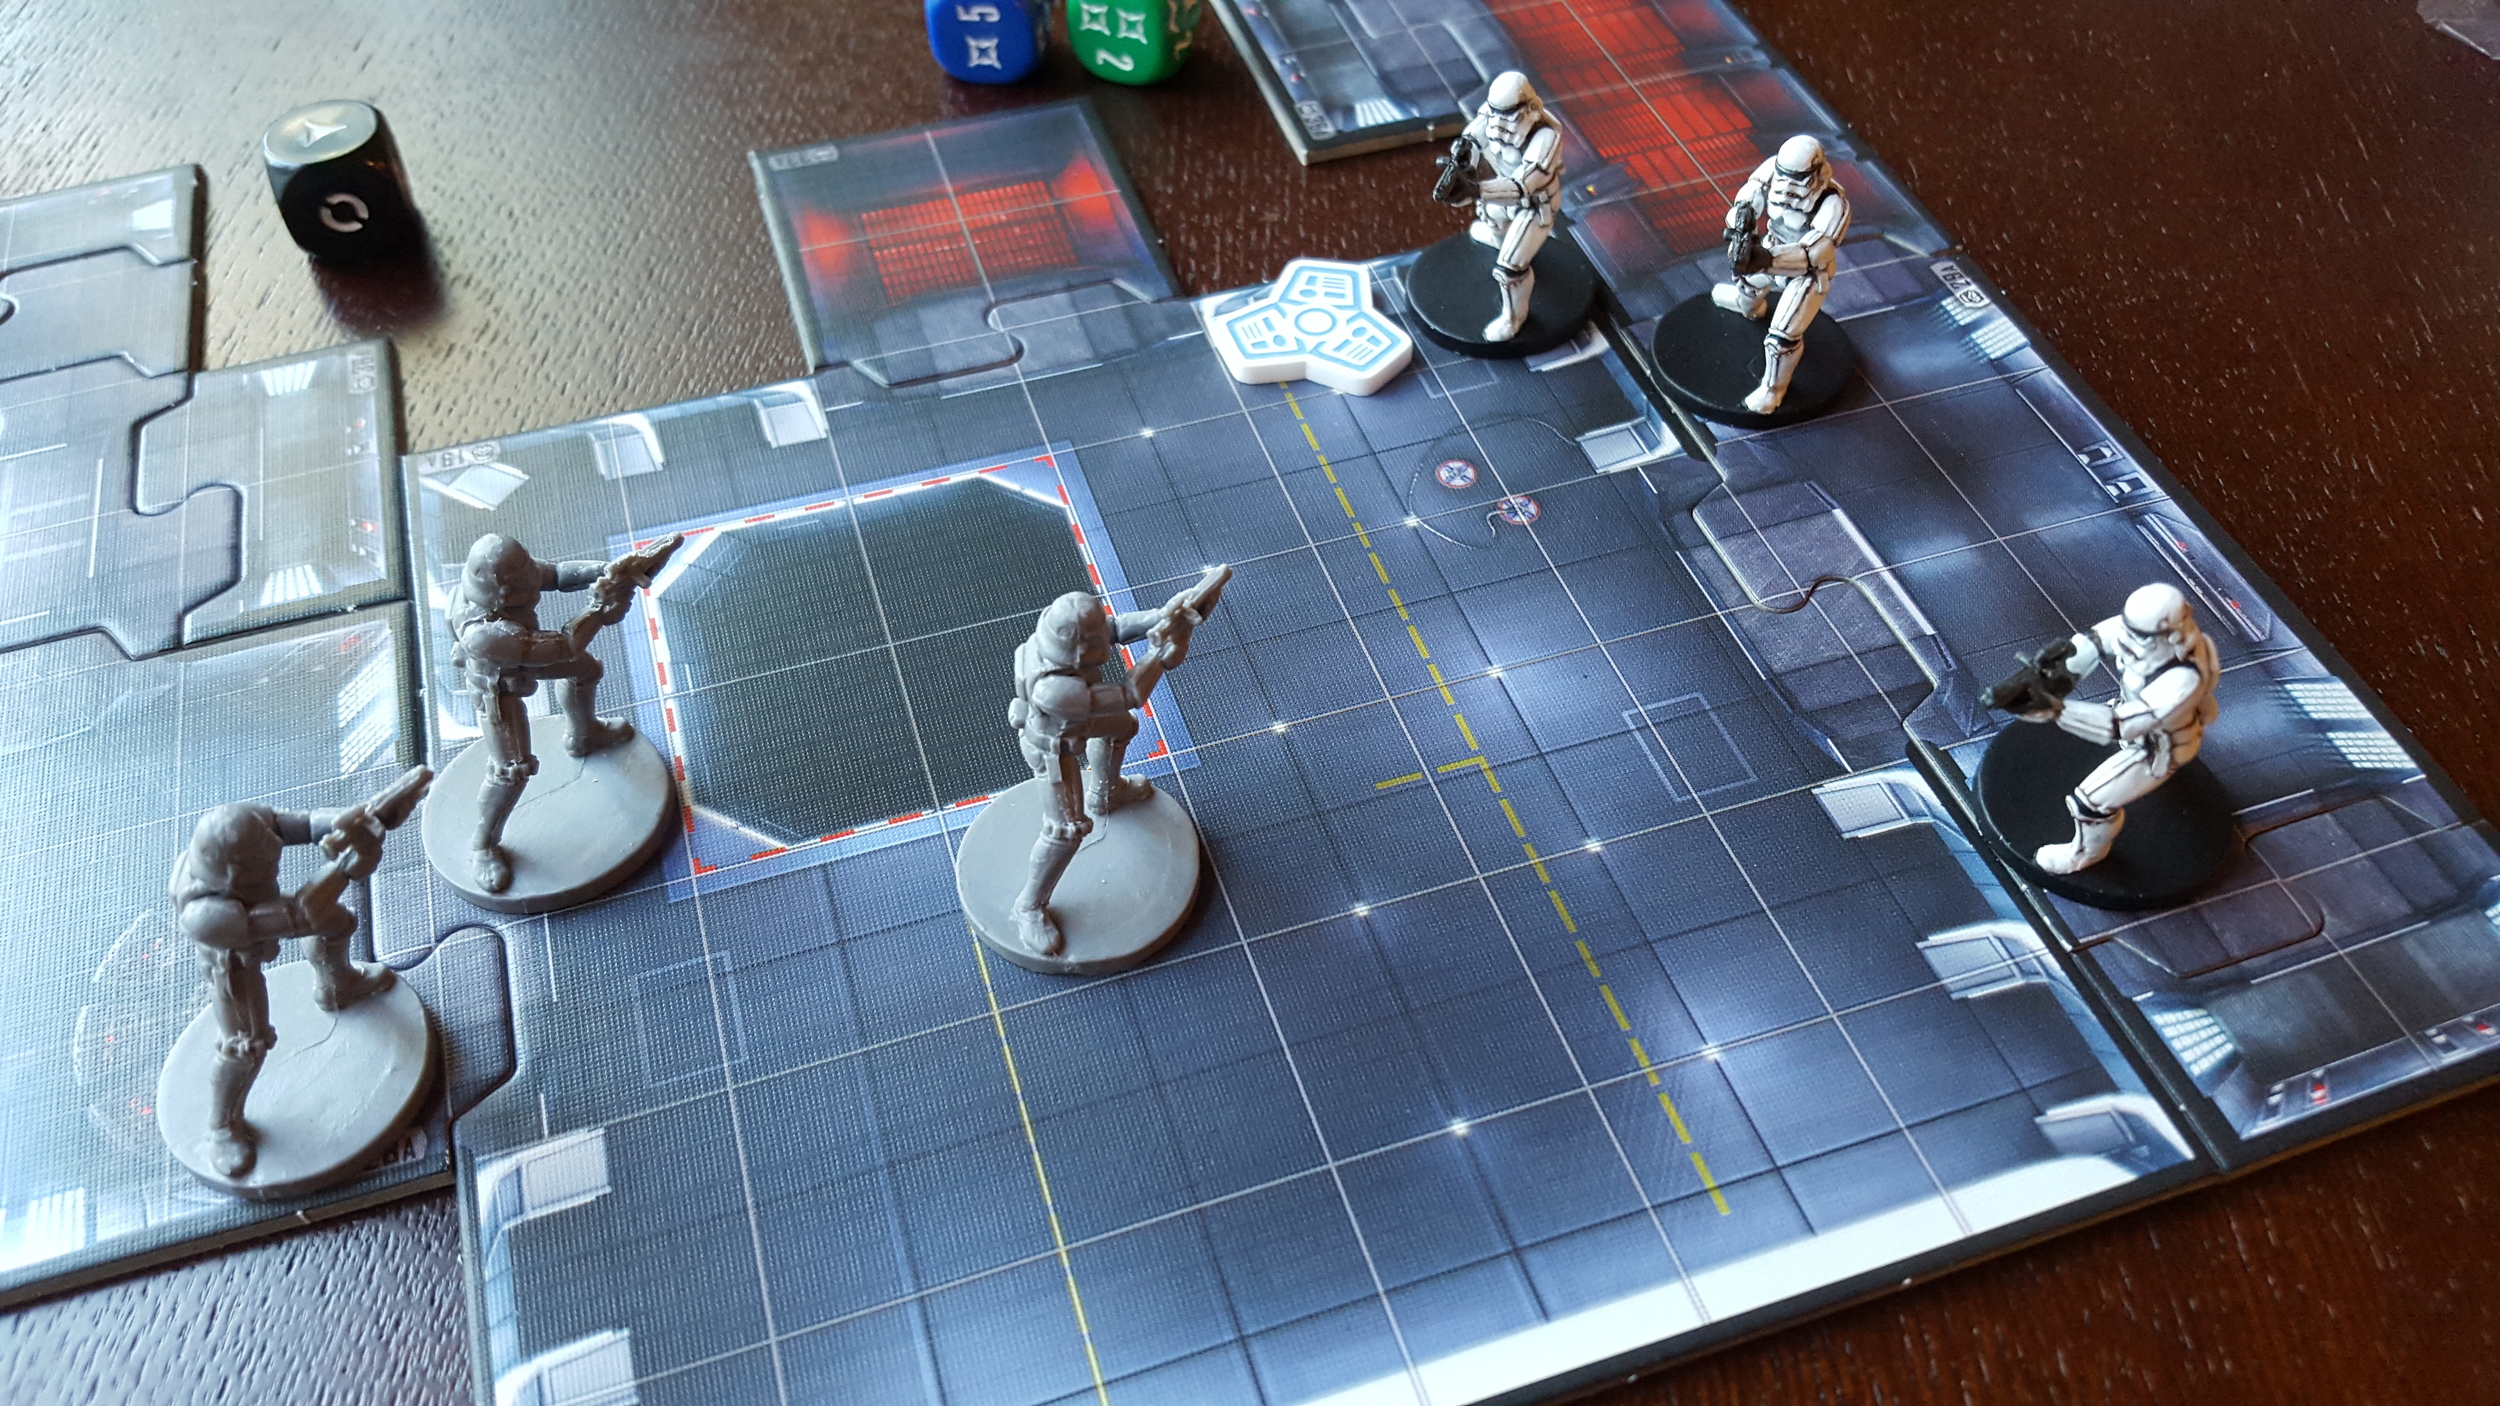
To re-post, here's the photo I took with my cell phone when my Stormtroopers were first completed:

There are a legion of issues with the photo.

  • The lighting isn't good leading to poor white balance.  I could have corrected the balance post-photo, but that seems like cheating for the point of this blog.
  • The focus of the picture, the Stormtroopers, is uninteresting.  There's no context for them.  My goal was to show how painting the miniatures, even poorly, improves their presence.
  • The background is busy, and not in a good way.  The paint streaks on the paper towel add character to the scene, but the ones on the left lead you away from focus.  Additionally, the window well and brushes on the right distract from the troopers.

The Emperor would not be pleased.

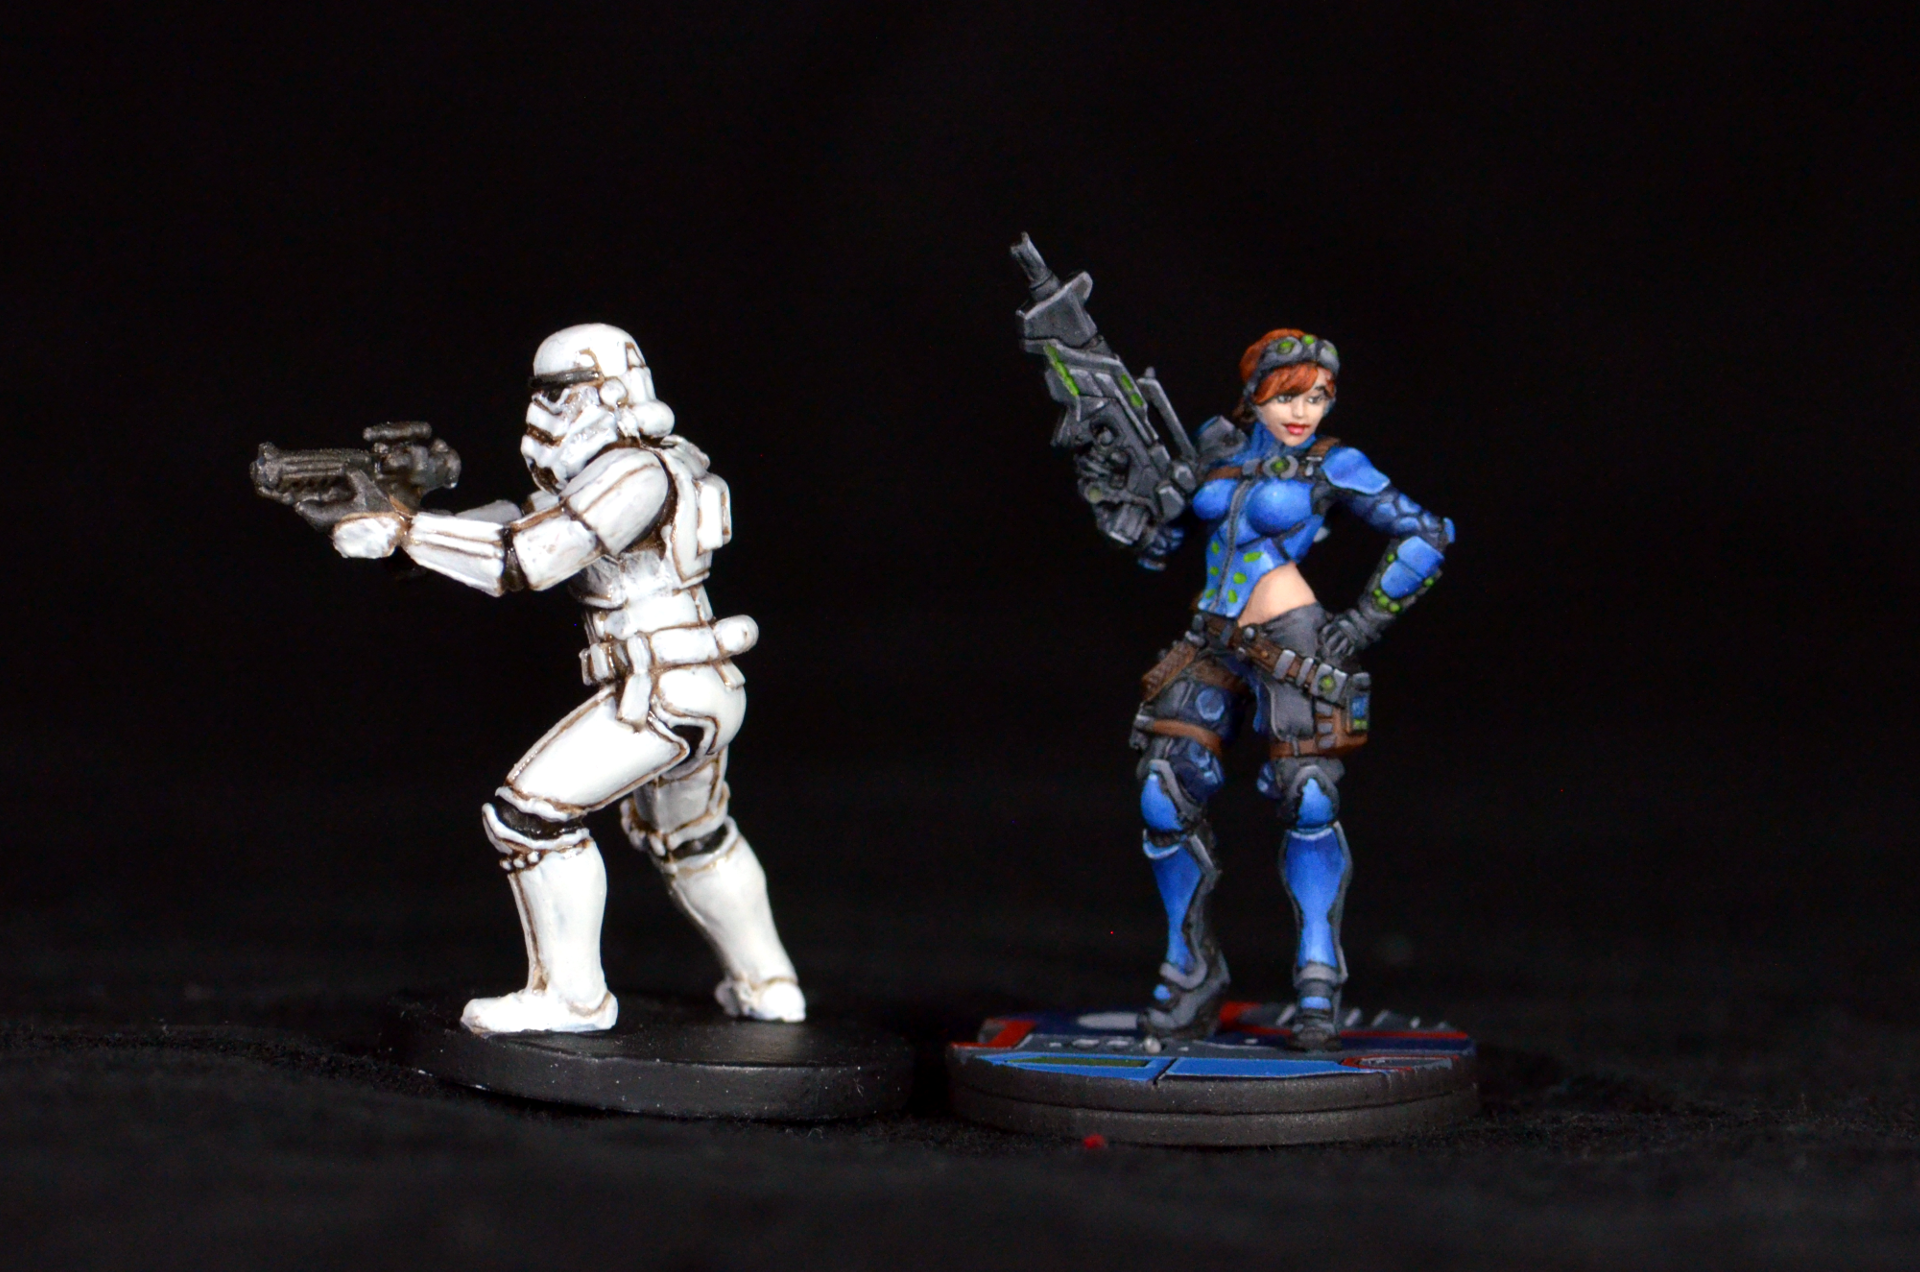
I decided to take 30 seconds to stage the shot and get better lighting, leading to this:

Sure, the shot still has issues, but it is a massive improvement!

The viewer gets a good idea of how dramatic the transformation from unpainted to painted is. It also gives context to the troopers being on the table and the improvement that makes.  The same ideas were attempted in the first photo, but without the extra effort and thought it is a significantly worse picture.

A big thank you to Scott for taking the time to create the video for Tiffany.  It's short, yet delivers great insight into taking better photos.

Something Like Painting: The First Stormtroopers

I never wanted to paint miniatures.

Or at least I thought I never wanted to paint them.

Painting figures for board games, also known as painting miniatures, is an activity often viewed in American society as nerdy-niche.  Something for socially awkward teenagers or old men with too much spare time.

Nearly two decades ago- when I was a socially awkward teenager- I had tried my hand at painting Star Wars Miniature Battles figures, resulting in unrecognizable white blobs of Stormtroopers and half-finished soldiers of the Rebel Alliance.  Now that I am an old man (as evidenced by the Old Chub shirt I wear as I write this), perhaps it is fate that I would return to miniatures and painting them.

Imperial Assault

Seeing as X-Wing had transformed me into a Fantasy Flight Games enthusiast, their newest game, Imperial Assault, seemed like a fantastic way to relive my childhood years with Star Wars figures.  Imperial Assault shares the same ideas an older FFG game, Descent, where a group of players take control of heroes to battle the forces of evil.  In Imperial Assault, one to four players act as a band of Rebel misfits to take on the forces of the Empire, controlled by one other player.  In essence, it is a four player co-operative game against one player controlling the forces of evil.

The box that Imperial Assault comes in is massive, and it should be for $100 MSRP.  Inside there are hundreds of cards, tiles to construct maps, a dozen custom dice, and over forty detailed miniature figures.  Opening the box is akin to opening a treasure chest full of art, Jedi, and rules.

The price tag was quite steep, and only a small set of X-Wing players from my two friendly local game stores would be interested in ejecting from their glorious TIE Fighters to play as mud-stomping Stormtroopers.  At the time, it didn't seem like a good buy.  I passed on Imperial Assault for months.

Enter Sorastro

By pure, dumb luck, I wandered across Sorastro's incredible YouTube channel.  Sorastro is an experienced miniature painter who produces high quality painting guides geared toward beginner painters.

This was trouble.  Instructions even I could follow to produce great looking miniatures.

I ordered the game when it was on sale.  After playing through a couple missions with my brother, it was obvious that the rules were solid and even fun.  Inspired by the play session, I attended a Regional tournament, taking 8th to earn special dice.

The First Squad

I decided that I would break painting the nine Stormtroopers that come in Imperial Assault into their three squads.  Three brave troopers were selected to be the first sacrifice, and were cleaned up a little bit by having some of their mould lines removed.  Some of the lines, but unfortunately not all.

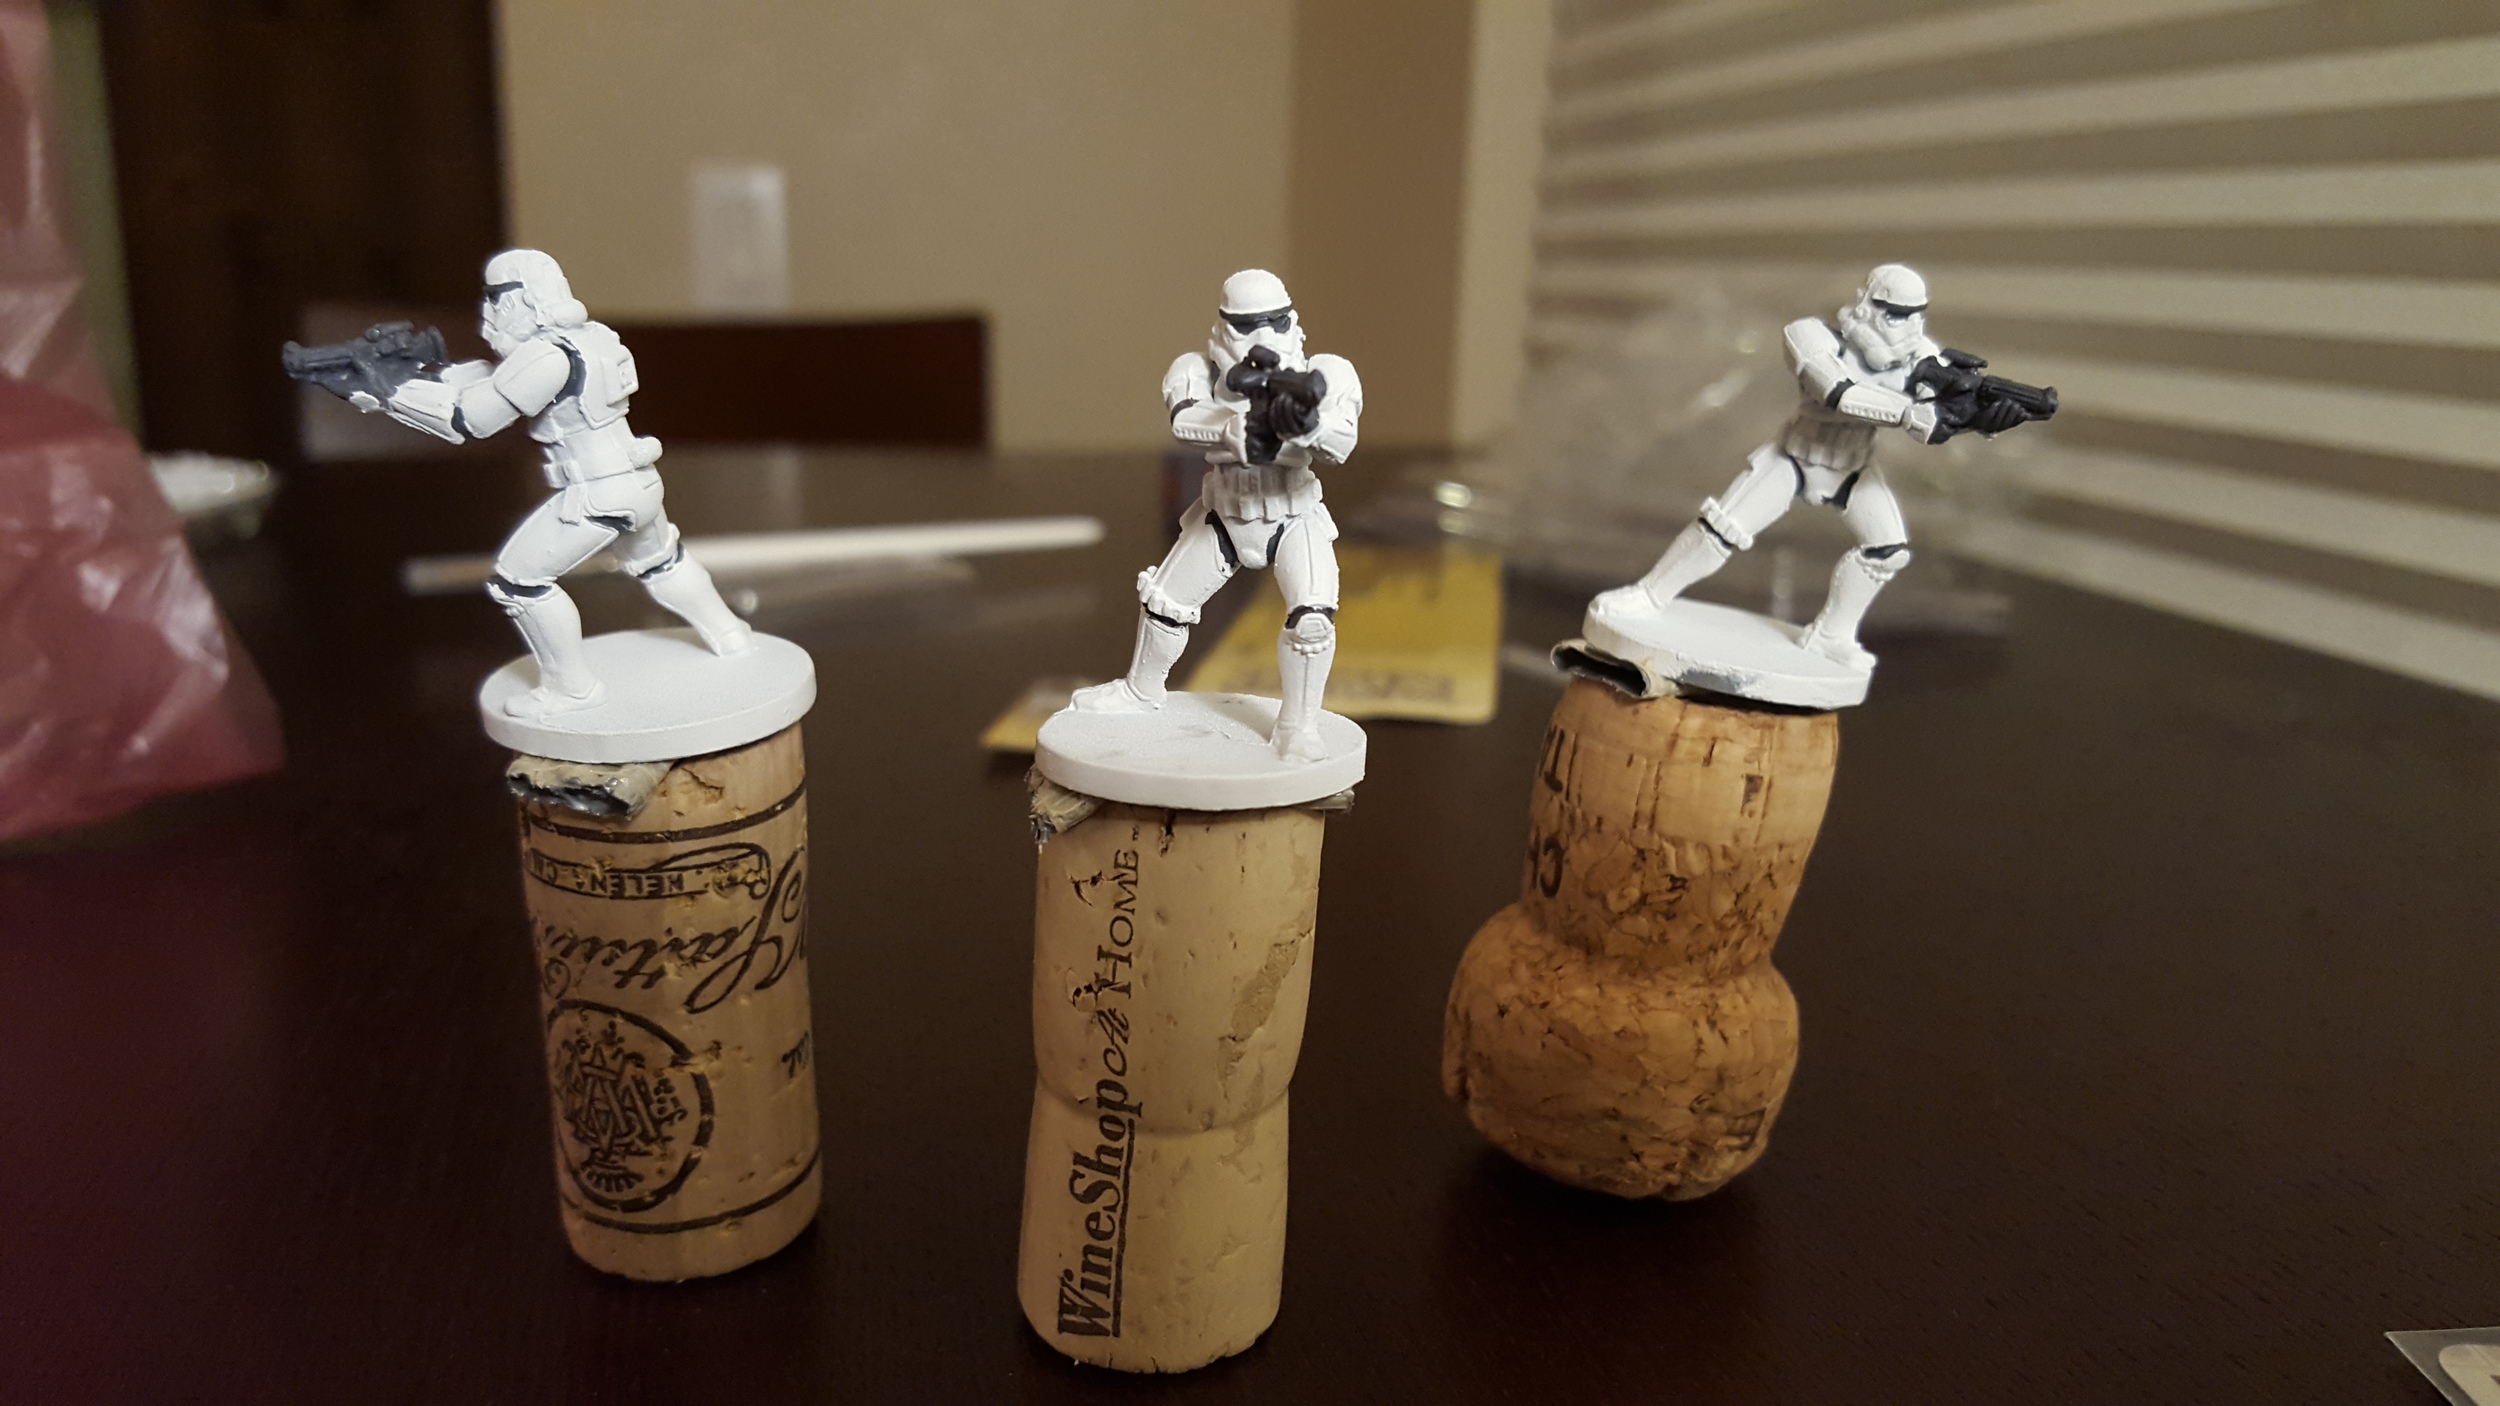
Next came priming, but in a moment of being completely brain-dead, I thought I did not have any sticky substance handy to hold them onto a piece of cardboard while they are spray painted.  The "brilliant" solution to this problem was to hot glue the figures to a piece of cardboard.  Three coats of white primer were applied to the troops, and they were left to dry overnight.

The next evening came the realization that it was going to be quite difficult to get the hot glued figures off of the cardboard, and then even more difficult to get the hot glue off of the figures.  Using a knife, the figures were removed from the cardboard.  To get the hot glue off of the bottom of the minis, the solution was to run them under hot water, which loosened both the plastic and the glue, and to peel the hot glue off.

The hot water worked as planned, but also warped the usually flat bases of the miniatures.  Oops.

From there, a first layer of detail was added by putting some gray into the areas that will eventually be black.  Even with a tiny brush, I simply could not get into the eye sockets as well as I would have liked.

First stormtroopers primed and first details added.  Yes, that is duck tape holding the minis to the corks...

Now it was time to apply shading to the troops.  I had received the basic paint set from Army Painter as a Father's Day present, and it seemed like it would fit my needs perfectly.

However, upon putting a few drops of the shade into the palette, it was obvious that the shade wasn't black, but actually a brown.

Well, this wasn't in Sorastro's videos.  What next?

Blindly marching forward like any good Stormtrooper, of course!

The next problem was from pure inexperience; how thick should the ink be applied?  Fearing that too much ink was being applied to the mini, a fair amount was mopped up.  This meant that there wasn't enough ink to shade quite a few spots, so a few of the troopers needed to have a second coat applied.

The next night was the first night of 3 of highlights.  As you likely guessed, more mistakes were made.

Upon opening the white paint I had received in the Army Painter set, it started oozing out.  The paint was not coming out as a liquid, but a white, caterpillar-like jelly.  And it continued to be belched slowly from the dropper like toothpaste being puddled on your freshly cleaned floors by a toddler.

Not good.  The paint had obviously dried out, and may not be usable at all.

I caught some of the white slime in the palette, and began trying to revive the dehydrated patient with numerous drops of water.  Eventually, I was able to mix it back to a reasonable consistency (not that I understood what a reasonable consistency was), and began to highlight the first mini.

It was immediately apparent that it would take more than one coat of white to take the troopers back from a light brown to a white.  What was unexpected was that it took three coats before the trooper looked well covered.

The first highlights.  The trooper on the left has had three layers of white applied, the middle only one, and the right none.

Another newbie mistake was to use a brush that was entirely too small for the process.  This meant that it took over an hour merely to apply the first layer of highlight.  Bravery and a bit of wisdom kicked in for the other two, and a larger brush was used to save time.

I chose to paint the bases black instead of Sorastro's gray for a few reasons.  I feel that Black is a bit more of an Imperial color, and since not all players will know what good guy and bad guy figures are, I want the bad guys to be more uniform.  Second, the American thing of needing to be different kicked in.

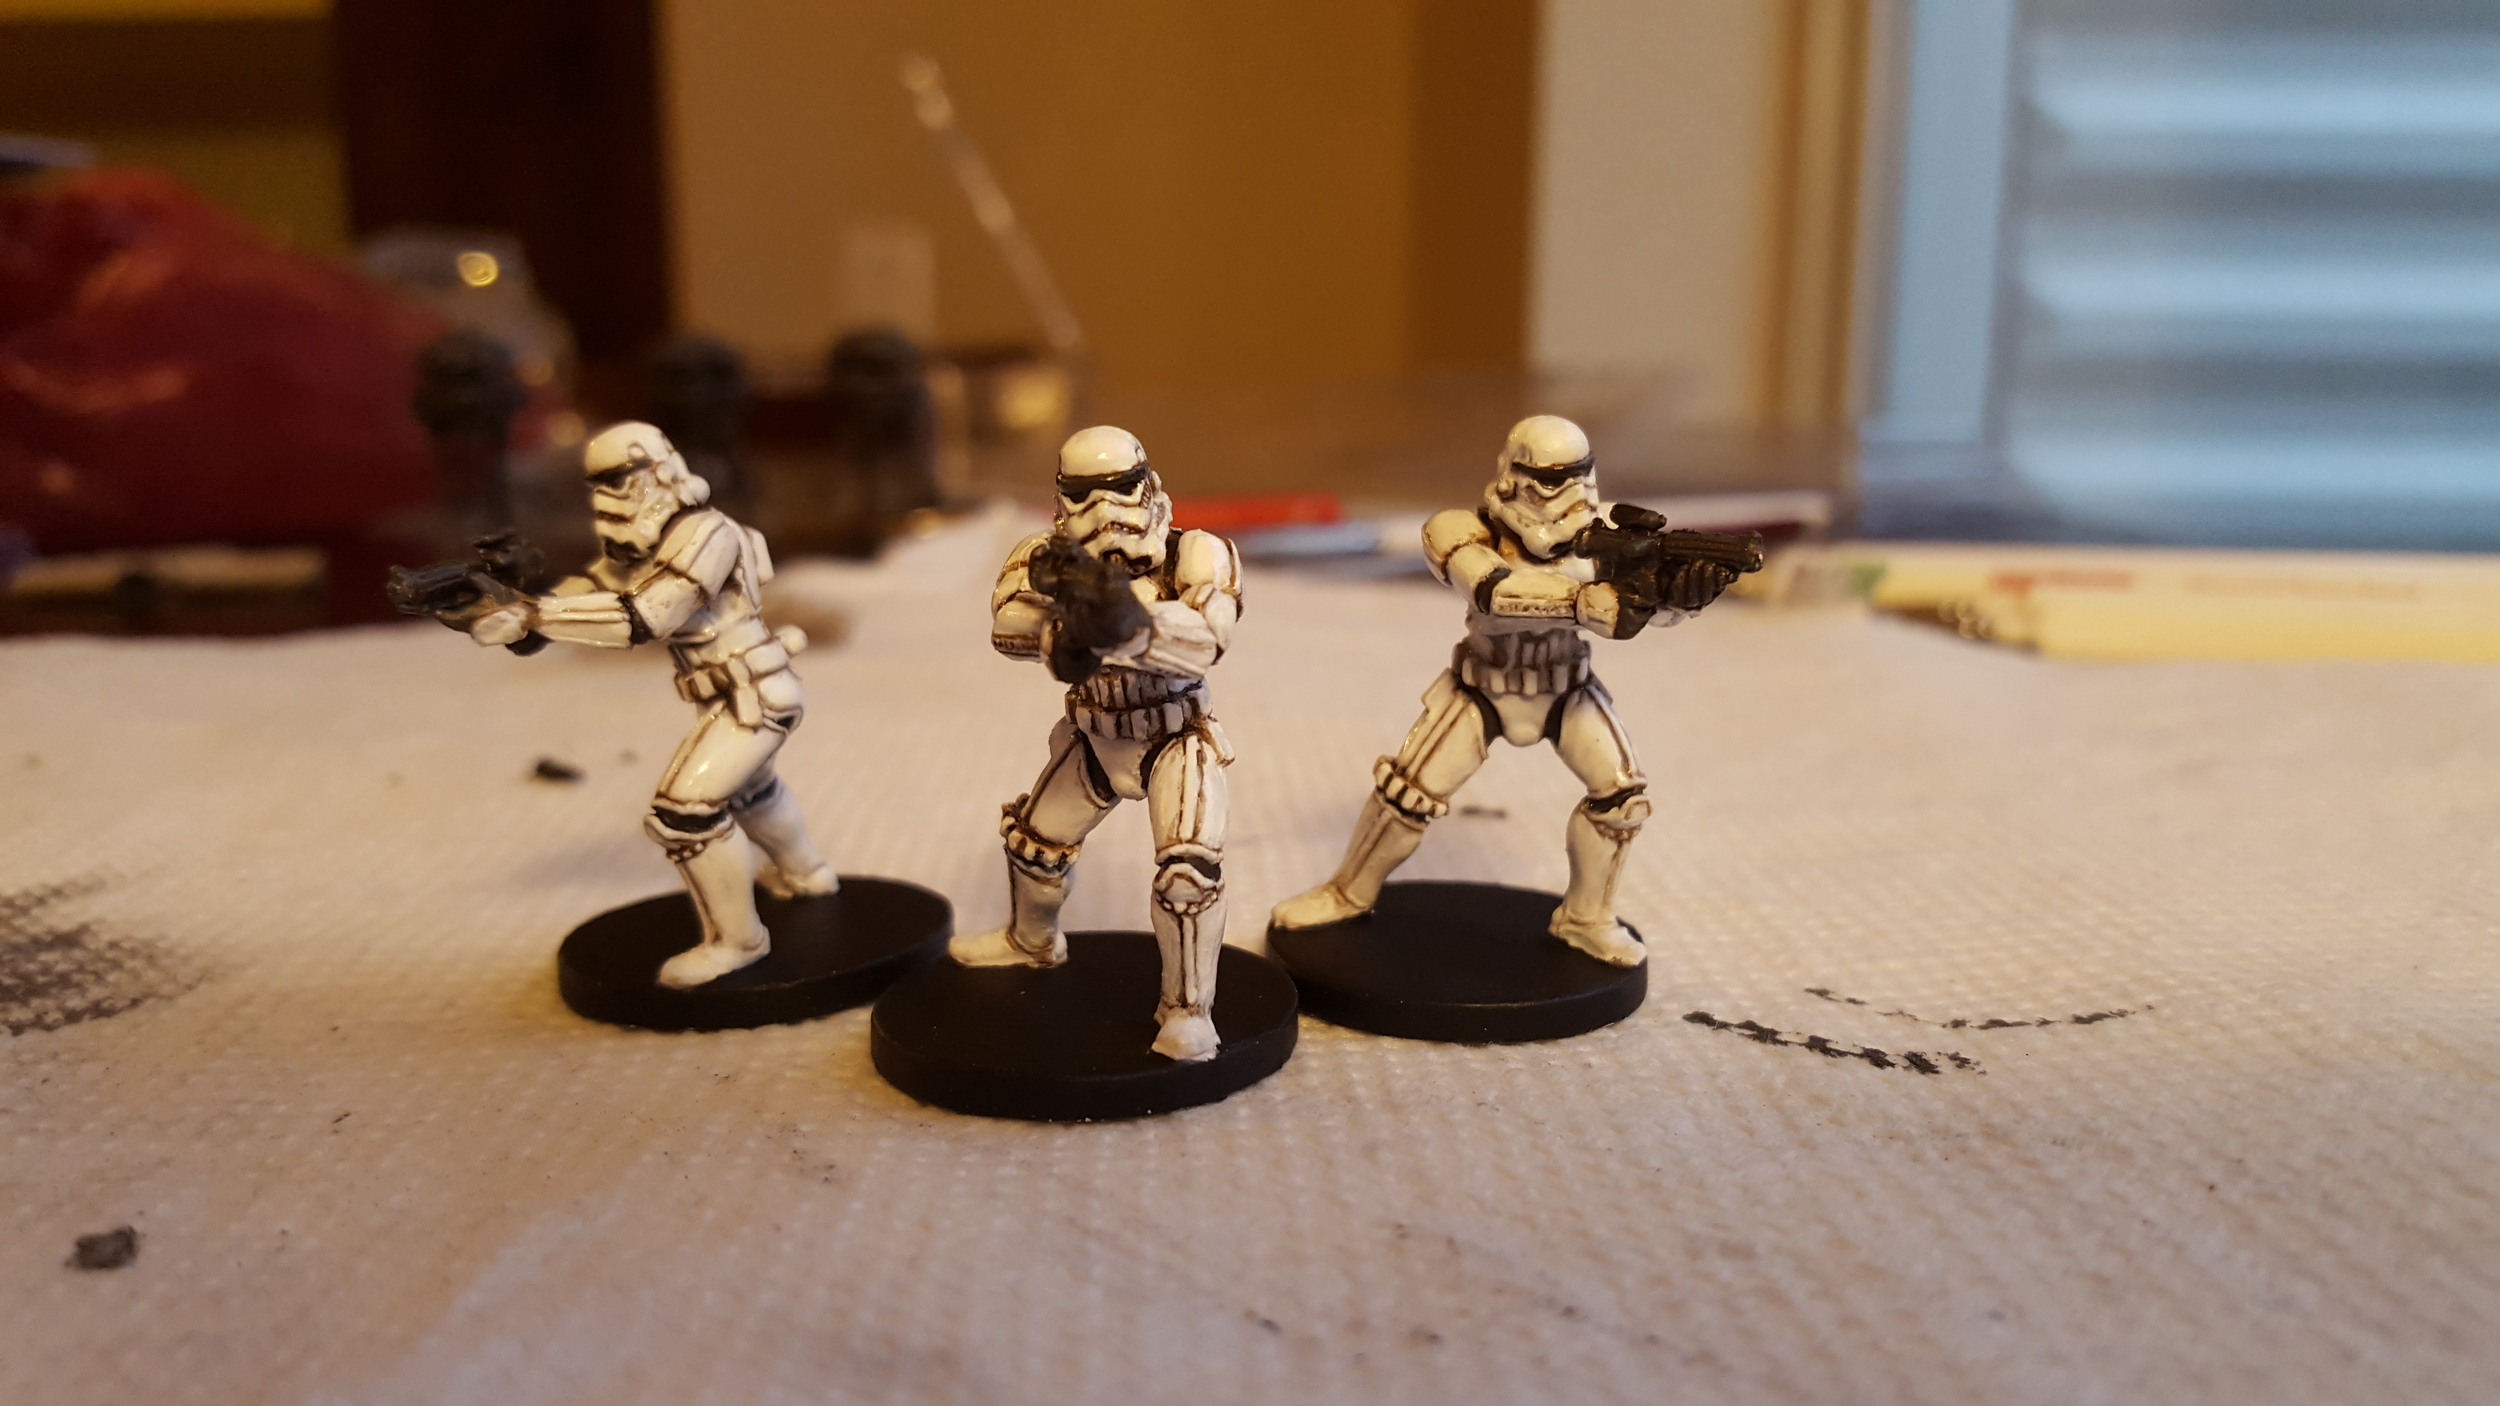
Last, the minis needed to be protected.  Testor's dullcote was applied, and the next morning a final layer of Citadel's Ardcoat to give them the Stormtrooper shine.

The squad, ready to hunt some Rebels.  Unfortunately my cell phone's white balance makes these look more brown than they are.

Closing Thoughts

A ton of mistakes were made over the course of painting these three.  A brief summary is:

  • Mould lines were not removed well enough.
  • Hot glue to hold the miniatures while priming, causing them to warp.
  • Primer was applied unevenly, and left a rough texture.
  • A brown ink was used instead of a black, making them look dirty and not providing enough contrast.  The guns in particular lack contrast and details.
  • The white paint had dried out and had to be restored to proper consistency using water, yet it was still too thick.
  • Black spots were covered over with white.
  • The texture on the helmet and some dark details were lost.

And yet, these mistake-saddled Stormies pop on the table; a massive upgrade from playing with gray figures.  I have an inkling of pride in the result after six hours of painting, and these Stormtroopers are ready to take blaster fire from the brave heroes of the Rebel Alliance.